Sunday, 15 December 2013

Colour Synching

scott pilgrim logo before effect was added

duplication of layers which had to be tinted different colours.
What I thought was going to be a very straightforward process turned out to be relatively complicated. The synching of colour within a layer basically meant that I had to duplicate said layer twice (which drains CPU) and tint them red and blue. Then I had to drag them slightly to the side and turn the opacity down considerably, adding a motion blur also.
Slight color around the edges of the lightening bolts signifies a
color synch. The effect was originally a mistake and was called 'bad TV'
in an old version of Final Cut Pro
When a musical beat is heard in the clip, the colour synch effect is intensified, corresponding with the swell in sound. A more random, sporadic colour synch effect had to be applied to the Scott Pilgrim logo and the camera tracked text, in accordance with the original footage. The entire effect gives off a playful, light hearted vibe in accordance with the film's themes.
colour synch was also applied to the surrounding footage


scott pilgrim logo after colour synch effect was added


Friday, 6 December 2013

Final Animations

Experimenting with animatics before was successful, so now I had the task of creating the actual animations which are going to be incorperated into the final video. The three animations I had to consider were the first 'lightening bolt' animation within the video, the second one, which is more pronounced in its visuals and is in time with the music, and then the Scott Pilgrim logo itself, which moves in a very particular way:
lightening bolts in original video

scott pilgrim logo, which has edges which move along the text itself
Cutting out the shapes in Photoshop and creating individual frames, I inserted these frames into Premiere and made them each 1/24th of a second long. Next I exported the files and added them into adobe after effects. The original footage contains animations with a 'color synch' effect (not too dissimilar to the visual style of an old 3D film when you remove the cardboard glasses); I have no idea how I am going to achieve this effect at this point as after effects does not contain a 'color synch' preset. The animations however are now in place and keyframed, which was a long and arduous task, not to mention the masking that had to be done in order to give the animatics a sense of depth, successfully integrating them into the 3D space of the video.

masking the animatics


Monday, 2 December 2013

Set Extension


After viewing the rushes, it became apparent that the footage we had shot did not contain a significant enough camera move to replicate the original shot. Furthermore, the set that we used was drastically different to the one that was originally featured. To combat this problem, I came up with the idea of integrating a set extension to the footage, enabling me to create a more faithful virtual set, and also letting me track back further than we did originally with the application of key frames to the footage that we shot.

In order to create this set extension I screenshotted a frame from the footage we had shot, and preceded to 'clone stamp' around the edges, making the image appear wider than it was originally.

application of the clone stamp tool to the walls and the floor (below)


The side walls in the original footage are a lot narrower, so I decided to integrate artificial walls into the set extension also. The walls were created from a free texture I obtained online, which were then skewed and the colour changed in photoshop.

application of the floor extension in photoshop
Next I imported the final image into after effects and preceded to key frame the original footage in an artificial track back, matching up the curtains in shot to ensure that they blended well and did not falter away from each other, something which happens a lot when key frames are applied to images.
animating and matching up both elements

after some blur was added, it appeared as if the footage was part of the extension

Although far from finished, for now it is adequately blended and will require some additional masking and feathering around the edges to blend completely.

Thursday, 14 November 2013

Camera Tracking and Smooth Motion

So now the basic edit is done I will be focusing much more on the one shot I have assigned to me. To start off I needed to know how I was going to have the text and the 'lightening' animations to match the camera move on set. After visiting some tutorial websites and having several basic inductions I came to the conclusion that I needed to start to learn Adobe After Effects, whose many tools include a camera tracker and also the ability to provide smooth motion to key framed objects which is virtually impossible to do in Adobe Premiere. This is the camera tracker tool:


By pressing 'Track Camera' it tracks various random points in your video and essentially creates a 3D space for you to add objects or text that will stay in a fixed position within the motion of your video, giving the impression that they are at one with the raw footage. So I added text to one of the track points:
The 'Bullseye' tool, which you can alter depending on
how grounded you want your text to be within the video

A hell of a lot of rotating and altering on the x, y and z axis
eventually gave the impression that the text was standing
upright on the ground as the camera tracked out
So after a lot of experimenting and rewinding tutorial videos I eventually got the desired effect. Next on the agenda was the 'sofa' shot integrated into the same shot as the text. The way I wanted to do this was by photographing a still image of the actors on the sofa, with their heads facing the other way, cutting out the background in photoshop and then key framing the still image so it appeared that the camera tracked back beyond the sofa. I replaced the background with green so it could be easily keyed out.


After cutting out the background and trying to key frame the image in after effects I ran into a problem; key framing requires manually animating the image and the result was that as the sofa shot moved forwards it was in no way smooth. As the video played, the shot slowed down jarringly instead of smoothly slowing down and coming to a standstill. To combat this I realised that After Effects had to have some kind of graph based key framing which, thankfully, they did. Much like applying a curve tool effect in Photoshop, the way the key frames were positioned had to curve smoothly:


After applying this particular effect, the sofa shot was smooth and it finally began to slightly resemble the finished shot in Scott Pilgrim. Much more to do, such as applying the camera track to the sofa shot (which proved insanely difficult) but thats another blog post for another time. See y'all soon.


Monday, 4 November 2013

Beginning To Edit

Once shooting had finished we began to experiment with editing the raw footage. No effects have been applied yet, but relatively quickly we ran into some setbacks. Some of the close ups of the instruments we completed relatively quickly last saturday turned out to segway to far from the original clip. The issue mainly had to do with a lack of punch when it came to hitting drums/strumming guitars etc.
The note on the rough edit letting us all know that a small
re-shoot may be a good idea.
The synchronisation of the original video with our video has so far been the most successful editing aspect. Colour grading and 2D/3D visual effects are obviously going to be a challenge, but with the footage that we have so far shot, I think we may be able to make it work?
The sync with Gordon's and Cera's performances

Experimenting with key framing and motion tracking


Shooting

So last saturday we finally cracked down with the shoot. Aside from a few minor setbacks, one being the band we originally wanted to film pulling out at 11o'clock the previous evening, another being that a drum kit suddenly was not available, the shoot all in all went smoothly.
Ben lighting Knives's (Played here by Ariane Cole) reaction shot. Ben's face suggests that he is happy with said lighting.

The scene lit and ready to shoot. 
Filming the first sequential shot in the video. Timing of dialogue and camera movements was especially  important here. Gordon Gowland Jones, also in our group, took on the role of Scott Pilgrim after the band pulled out. I took on the role of Steven Stills. Luckily our voices are going to be dubbed by the original sound so our terrible mimicking of the characters voices will never be presented to the world.
Filming the final section of the shoot, the long tracking shot which required us to go into a much larger studio. The most complicated element of shooting was this one, we used a crane to pan slowly out and then down. Much of the elements seen in the original video (including moving text, lightening animatics, colour correction and possibly the rug also) will be added in Adobe After Effects. Shooting took roughly five hours, using a Canon 5D.
Gordon Gowland Jones and Ben Gwyther after the day's shooting. I was fine.


Tuesday, 22 October 2013

Incorporating Animation Into Raw Footage - The Lightening Bolts

The way that Scott Pilgrim blends animation with live action gives off a sense of speed and chaos, in conjunction with the scene which involves a band opening a fast paced and erratic song. To replicate this I did a quick test using Adobe Photoshop and Adobe Premiere Pro. First I created a similar lightening bolt to the ones used in Scott Pilgrim with a simple white box and the lasso tool:


Next I duplicated the layer, synched it so it was slightly to the left, and turned down the opacity. A further lightening bolt layer to which I applied a motion blur:

I then imported the image into Premiere, put four of the same image into the timeline, and adjusted sizes accordingly so the bolt would grow bigger and smaller again. Repeatedly copying and pasting the frames created this ten second test clip:


Using the multiply tool in Premiere and key framing the video to match the raw footage, adding some colour synch to replicate the borders of the original lightening bolt will hopefully make for a satisfying replication of the animation on the original Scott Pilgrim opening credits. 


Monday, 14 October 2013

The Technique Of The Shot

The particular shot I have chosen to analyse is the one at the very end of the chosen clip, right before the opening credits. A series of practical and visual effects will need to be completed, namely the integration of text and moving visuals which are effects which are generally dealt with after the initial shoot. The matter at hand now stands with that daunting set extension:
Before this shot is revealed, the room appears substantially smaller, which means that when setting this shot up we will have to move locations. The idea of using a spacious village hall has been talked about, in which we can use a smaller space within the hall to shoot the initial segments and then move onto the bigger space once it comes to shooting this shot. Props can be moved around and it can therefore be made to look like the same space initially before panning out to reveal more.

There is the issue with the amount of technology we have at our disposal, for example the current dolly tracks we are allowed to use do not stretch far enough, and also you would be able to see them in frame as it pans out. The solution to this is to, rather than use a dolly track, to use one of these:
Tripods can be attached to one of these and they glide relatively smoothly across a floor (a slight bump in a moving shot can be fixed with the Warp Stabiliser tool on Premiere Pro).

The clip (shown in the previous post) ends with the camera swooping over the sofa to reveal Knives and Neil, silhouetted, watching the band's performance. Because the use of a camera crane (the technique used for this shot in Scott Pilgrim) is not within our grasp at the moment, additional footage of two silhouetted figures will have to be shot against a green screen, or a JPEG image taken of two people on a sofa, the background replaced with green and then it be integrated into the final shot via chroma keying and key framing.

These initial techniques will hopefully be a cost effective way of replicating the shot, at least in terms of practical effects. Visual effects come later.

Tuesday, 8 October 2013

My Group Decision: Scott Pilgrim vs. The World (and possibly final destination)

After presenting the clips shown, we have decided to try and replicate a clip from the fantastic 2010 graphic novel adaptation 'Scott Pilgrim vs. The World'. The clip in question is right before the opening credits (starts at 1:08 and finishes at 1:42)


Presenting erratic animation overlaying the shot, some tricky lighting techniques, fast cuts, whip pans and warped reality (shown here as a set extension tracking out to the sofa before the main title appears) this clip should prove to be a challenge, and indeed a lot of fun, to replicate. To take into account here is the following:

-How we are going to track out revealing a spontaneous long corridor/occupied sofa
-How we are going to light the scene to match the original
-What space we are going to use to shoot the scene
-How we are going to blend the lightning sound animation into raw footage
-How we are going to achieve the lightning sound animation in the first place
-Key framing moving titles into the shot effectively

So far, I believe that the 2D animations which are implemented into the shots will be the easiest to complete, as the process basically consists of hand drawing the frames, importing them into premiere and after fitting them together and looping them, place them over the raw footage and key frame accordingly.

The most difficult aspect will inevitably be the long track from the band to the sofa, which requires a suddenly elongated set space or a lot of complicated visual effects work. I now need to look into various visual effects techniques and/or appropriate sets if this effect is going to be achieved properly.

An issue with time (as in the replicated clip is less than one minute) has opened up an opportunity to also recreate the opening credits for final destination, a clip which requires next to no space and everyday props. The main challenge for this clip will be the titles which appear:
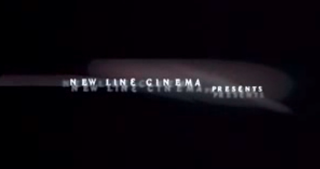
Probably be a lot harder to animate than it looks


Monday, 7 October 2013

POSSIBLE FILM CLIP #2. In Bruges 'Aye Aye'

It could be said that In Bruges is praised mainly on story and stellar performances from it's two leads. Whilst this is true, it is also an unusually aesthetically pleasing film, namely the scene in question which makes excellent use of shadow and a dull blue colour palette, signifying a darkly comical moment within a tense crime story. The clip is unavailable for embedding however the link is below:

http://www.youtube.com/watch?v=GpVHSA5DWEI

The way this scene cuts to the reactions of the two characters in the room is, in my opinion, perfect. Most of the time Ralph Fiennes is speaking, it is focused on him, however the audience responds to the scene perfectly due to the masterful way that as soon as you expect a character to react to the brash English attitude, it cuts to them. In terms of framing and indeed the colour palette, it sets an incredibly uneasy tone which is faithful to the themes displayed in the film, in this case, revenge, loyalty and personalities ground down by circumstance. Below is a single frame from the clip, demonstrating the cold, harsh colour which could be an interesting challenge to achieve through lighting and colour correction:


The way that Ralph Fiennes character is singled out from his surroundings achieves a sense of alienation; the idea of being thrown into a different culture and the way his particular character reacts to this is unusual, bold and ultimately very funny. Like I said before, this scene creates a very cold atmosphere through the muted blue colour correction, which would be the main focus of the project should this clip be chosen.

Unlike the first clip I have chosen, this may appear to be subdued in terms of actual post production, but it is ultimately what you do not see upon a first viewing which is most effective, which is why I believe this clip would be a very interesting and more subtle challenge to replicate.


Sunday, 6 October 2013

POSSIBLE FILM CLIP #1. Final Destination - Opening Credits

Although considered by many to be a relatively mediocre 2000's slasher film, Final Destination is, at least for its first two acts, filled with some fantastic visual moments. Namely, its opening credits are rife with visual plot foreshadowing, a tense, foreboding musical score and a general sense of fracture. Here it is:


http://www.youtube.com/watch?v=TdNpDFvNmZc

The sharp reflections which fade in along with the text demonstrate an understanding of the needs of its target audience; it is essentially a slasher film and what better way to show this than showing sharp objects and occurrences, namely thunder, a fluttering desk fan and text laid over what appears to be fractured glass.

Another incredibly interesting trait of this particular clip is the way it blends one shot with another. As the camera pans down the window, revealing a disturbing doll figure hanging in space, a slight fade, coupled with the sound of thunder, then another slight fade followed by a cut, is the way it blends together two shots, which could have been achieved with a simple cut. The desk fan (which when zoomed into, is actually an incredibly effective representation of fear of the unknown. What did I see behind those blades and bars of metal? I cannot tell, for a great majority of the time I see blurred outlines, which reveal only to briefly what is behind) acts as an anchor for the unnerving buzz prevalent  in the credits. Sound here primarily anchors a cut or a fade, something which i personally find very aesthetically pleasing. As the shot fades to reveal an extreme close up of the fan, the volume increases, followed by a sound effect which to our ears appears to be a knife being sharpened, coinciding with a credit appearing in the film's trademark 'cut glass' text visual.

Use of sound in conjunction with editing as well as the fantastic visual representation of turn of the century slasher horror is why this excerpt interests me so much. I believe it will be a rewarding challenge to replicate such a visual and auditory feast. 


A face behind the fan?
Fractured and monotone, what a way to start a slasher film

Documenting My Production Practice

Hello There
My name is Ben Kersey and I am a second year film student studying at Falmouth University, Cornwall. For this semester I am taking the module 'Editing and Post Production'; part of this module is providing a production portfolio of the task in hand which is essentially recreating a scene from a film. a shot for shot representation of a visually striking, craftily edited piece of cinema. And so, from today, many a post will show up on here describing in detail how me, and indeed others taking the same module, will choose a short clip, deconstruct and analyse it, decide how we can feasibly represent the visuals of each shot, plan and film these shots, edit them together (which includes any visual/special effects work which needs to be composited) and finally how we inevitably sit back and smile gleefully at our finished product, with champagne and high fives all round. 

If anyone is wondering about the meaning of the title, it is a combination of my favourite director Danny Boyle's first film Shallow Grave, and just the word 'Title', because what better way to represent a title with the word itself. Maybe. I don't know I may change it, so it fits in more with the task at hand but for now, lets see how it pans out.

"I'm not scared! I'm a little terrified maybe" Alex Law, Shallow Grave