Thursday, 14 November 2013

Camera Tracking and Smooth Motion

So now the basic edit is done I will be focusing much more on the one shot I have assigned to me. To start off I needed to know how I was going to have the text and the 'lightening' animations to match the camera move on set. After visiting some tutorial websites and having several basic inductions I came to the conclusion that I needed to start to learn Adobe After Effects, whose many tools include a camera tracker and also the ability to provide smooth motion to key framed objects which is virtually impossible to do in Adobe Premiere. This is the camera tracker tool:


By pressing 'Track Camera' it tracks various random points in your video and essentially creates a 3D space for you to add objects or text that will stay in a fixed position within the motion of your video, giving the impression that they are at one with the raw footage. So I added text to one of the track points:
The 'Bullseye' tool, which you can alter depending on
how grounded you want your text to be within the video

A hell of a lot of rotating and altering on the x, y and z axis
eventually gave the impression that the text was standing
upright on the ground as the camera tracked out
So after a lot of experimenting and rewinding tutorial videos I eventually got the desired effect. Next on the agenda was the 'sofa' shot integrated into the same shot as the text. The way I wanted to do this was by photographing a still image of the actors on the sofa, with their heads facing the other way, cutting out the background in photoshop and then key framing the still image so it appeared that the camera tracked back beyond the sofa. I replaced the background with green so it could be easily keyed out.


After cutting out the background and trying to key frame the image in after effects I ran into a problem; key framing requires manually animating the image and the result was that as the sofa shot moved forwards it was in no way smooth. As the video played, the shot slowed down jarringly instead of smoothly slowing down and coming to a standstill. To combat this I realised that After Effects had to have some kind of graph based key framing which, thankfully, they did. Much like applying a curve tool effect in Photoshop, the way the key frames were positioned had to curve smoothly:


After applying this particular effect, the sofa shot was smooth and it finally began to slightly resemble the finished shot in Scott Pilgrim. Much more to do, such as applying the camera track to the sofa shot (which proved insanely difficult) but thats another blog post for another time. See y'all soon.


Monday, 4 November 2013

Beginning To Edit

Once shooting had finished we began to experiment with editing the raw footage. No effects have been applied yet, but relatively quickly we ran into some setbacks. Some of the close ups of the instruments we completed relatively quickly last saturday turned out to segway to far from the original clip. The issue mainly had to do with a lack of punch when it came to hitting drums/strumming guitars etc.
The note on the rough edit letting us all know that a small
re-shoot may be a good idea.
The synchronisation of the original video with our video has so far been the most successful editing aspect. Colour grading and 2D/3D visual effects are obviously going to be a challenge, but with the footage that we have so far shot, I think we may be able to make it work?
The sync with Gordon's and Cera's performances

Experimenting with key framing and motion tracking


Shooting

So last saturday we finally cracked down with the shoot. Aside from a few minor setbacks, one being the band we originally wanted to film pulling out at 11o'clock the previous evening, another being that a drum kit suddenly was not available, the shoot all in all went smoothly.
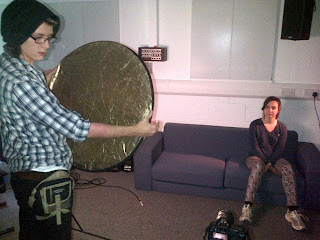
Ben lighting Knives's (Played here by Ariane Cole) reaction shot. Ben's face suggests that he is happy with said lighting.

The scene lit and ready to shoot. 
Filming the first sequential shot in the video. Timing of dialogue and camera movements was especially  important here. Gordon Gowland Jones, also in our group, took on the role of Scott Pilgrim after the band pulled out. I took on the role of Steven Stills. Luckily our voices are going to be dubbed by the original sound so our terrible mimicking of the characters voices will never be presented to the world.
Filming the final section of the shoot, the long tracking shot which required us to go into a much larger studio. The most complicated element of shooting was this one, we used a crane to pan slowly out and then down. Much of the elements seen in the original video (including moving text, lightening animatics, colour correction and possibly the rug also) will be added in Adobe After Effects. Shooting took roughly five hours, using a Canon 5D.
Gordon Gowland Jones and Ben Gwyther after the day's shooting. I was fine.